
This post may contain affiliate links. Please read our disclosure policy for details.
As a kid, I loved going back to school in the Fall. I loved getting new supplies, seeing friends that I hadn’t seen all summer, and starting to learn new things. As a parent, I am just as excited for my kids to head back to school and experience the fun and joy of learning. School has been in session here for a couple of weeks and so it is time to take care of those first days of school photos.
The Assessment
One of the most important tips that I have learned from Project Life is to begin with the end in mind. Sometimes it is hard to know where to start with memory keeping. As I was preparing this post, I decided to see what pages I had made for my kids’ first day. I realized that I had several years of gaps, so my focus for this week was to finish the pages that are missing. Using Project Life made this process quick and easy.
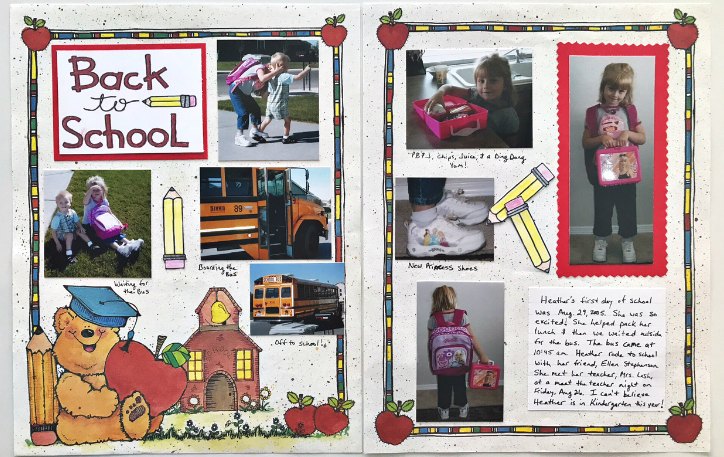
Our oldest daughter is a senior this year. I had recently posted these scrapbook pages of her first day of Kindergarten, so I knew I had 2005 covered. Ah, time goes so fast.
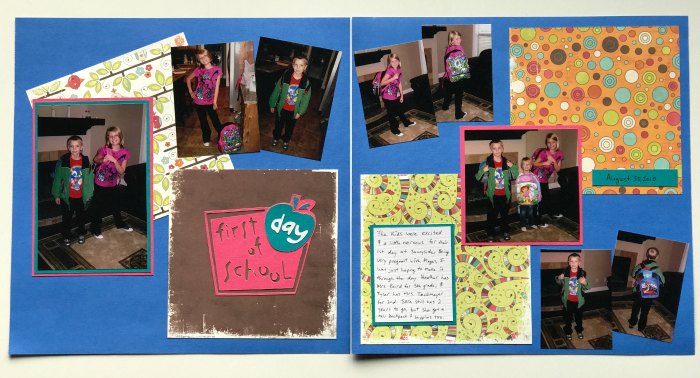
I checked my other photo albums and found that I had also scrapbooked 2010.
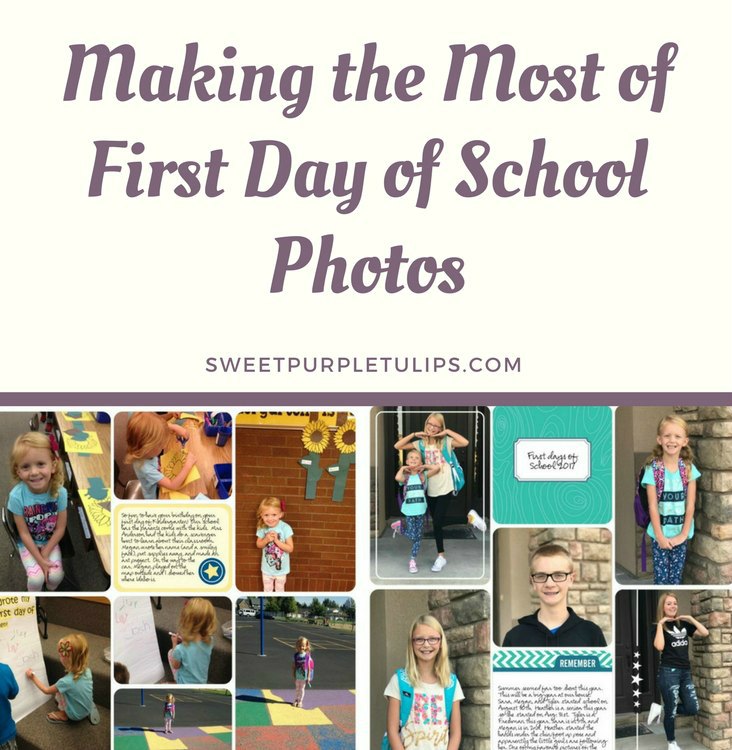
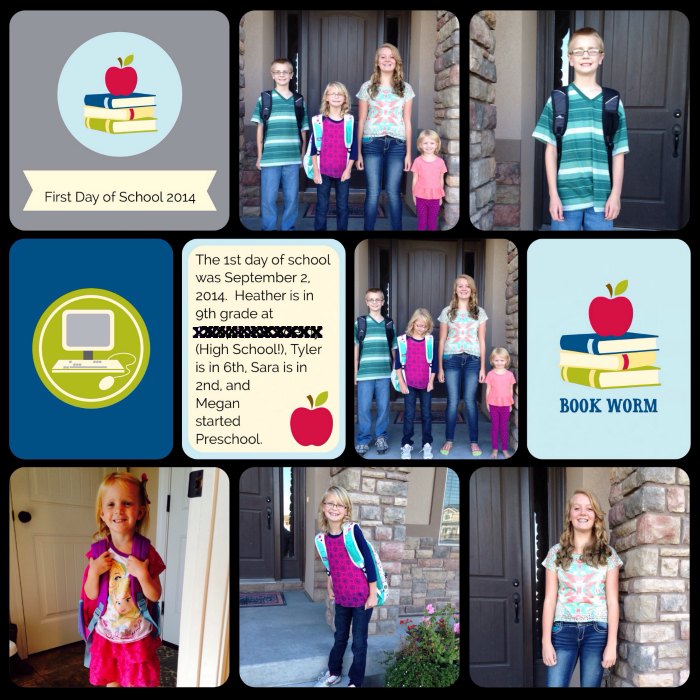
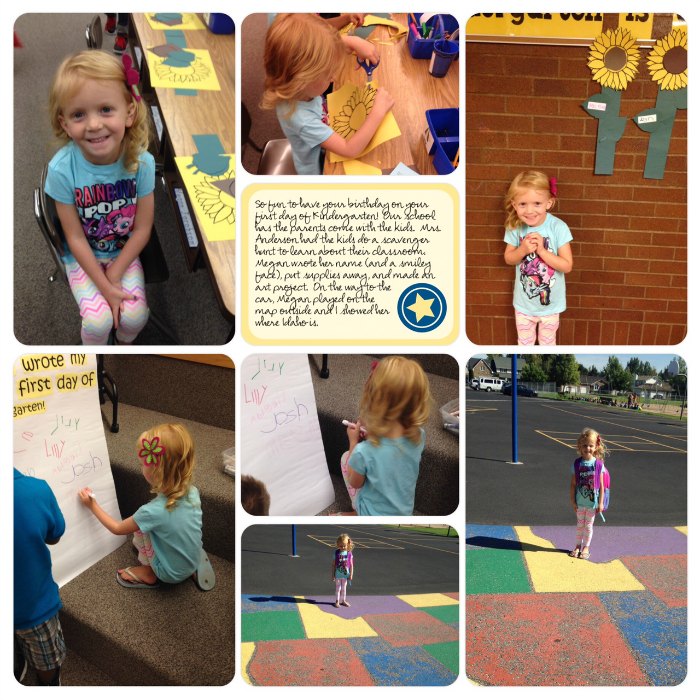
2014-2016 family books were completed with the Project Life App, so I knew that those pages were done. 2014 and 2015 pages use cards from the school themed card kit.
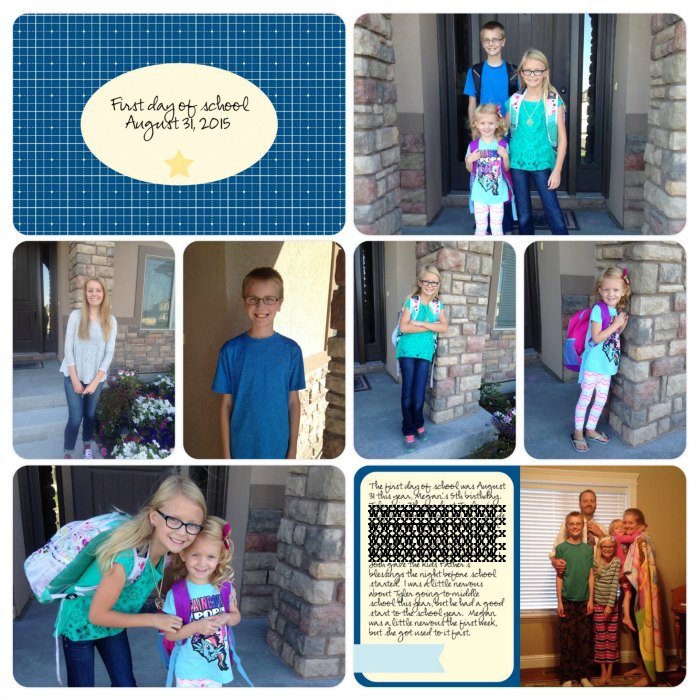
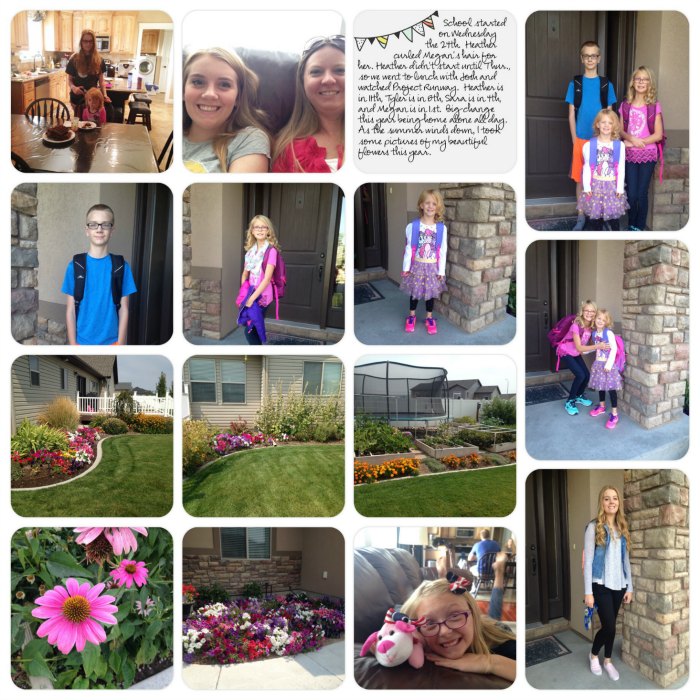
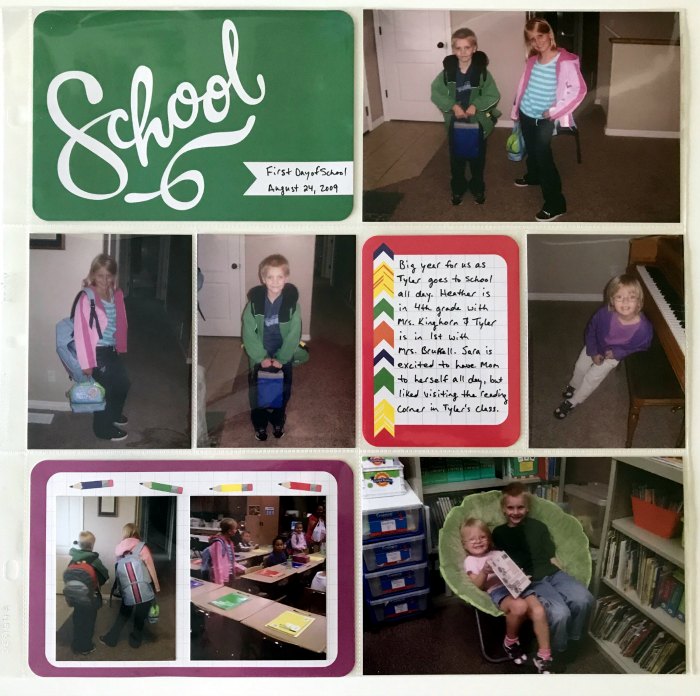
For 2016, I did a 2-page spread for the week. All of the back to school pictures were on the second page. Card from the Project 52 2016 edition card kit.
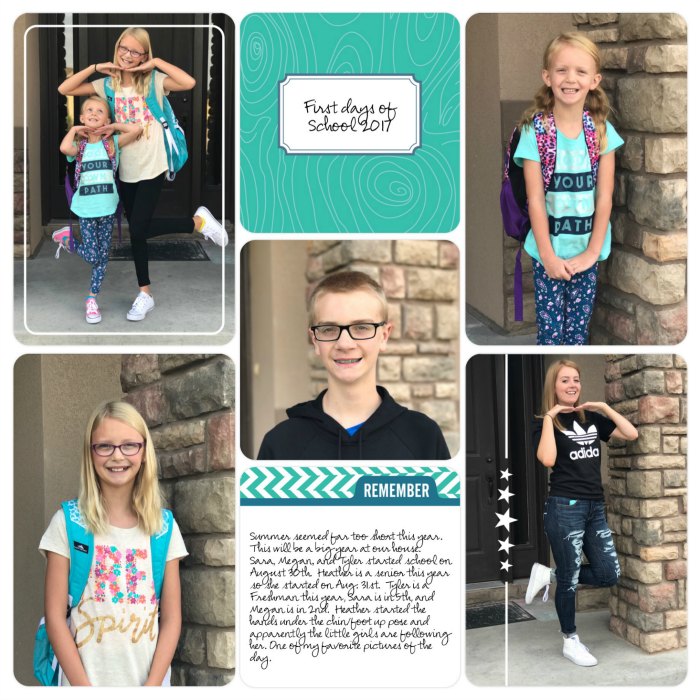
2012 and 2013 are still living on my computer hard drive, but I have a plan to tackle them when I focus on those years. I also need to catch up on my 2017 album, but I spent a few minutes putting that page together so now it is done.
My System
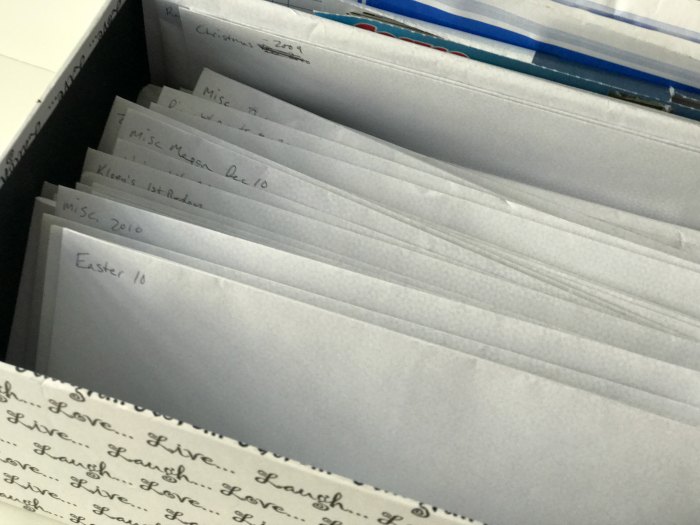
As a little backstory, I used to be very diligent about printing off my photos. I love technology, but I know that it fails. Having physical prints of photos has always been important because I worry about losing pictures if my computer fails. I would spend hours editing photos and have large batches printed. Then I would sort the photos into envelopes by event and store in photo boxes by year.
When I had time to scrapbook, I would decide which event sounded interesting and do that envelope of pictures. This was my system until I got a smart phone is 2012. For some reason, I just stopped printing pictures. I backed them up to my computer, but I didn’t make time to scrapbook so I didn’t print the pictures. As I mentioned in Rescuing Photos with Project Life, I found the Project Life App in 2014 and it changed everything.
Anyway, since I have every picture printed prior to 2012, I am using the physical version of Project Life to tackle those photos. After my assessment, I found that I was missing 2007-2009 and 2011. It only took me a few minutes to find those photos in their boxes. I laid them out on my craft table and got to work.
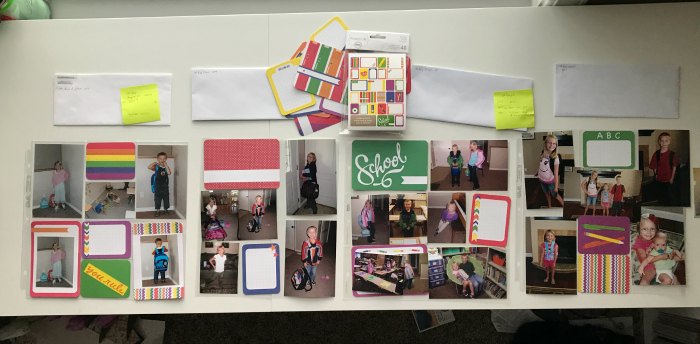
I decided to use the School card kit for these photos. Physical Project Life cards come in smaller card kits that will make a few pages or core kits that have hundreds of cards for a complete album. Page protectors come in a variety of page designs (I recommend getting a big variety pack). Current albums, card kits, and page protectors can be found at beckyhiggins.com or you can find them on Amazon (this link will take you to the big variety pack). I used different page designs for these pages because of the different sizes and orientations of my pictures. These pages came together in no time with this system.
The Pages
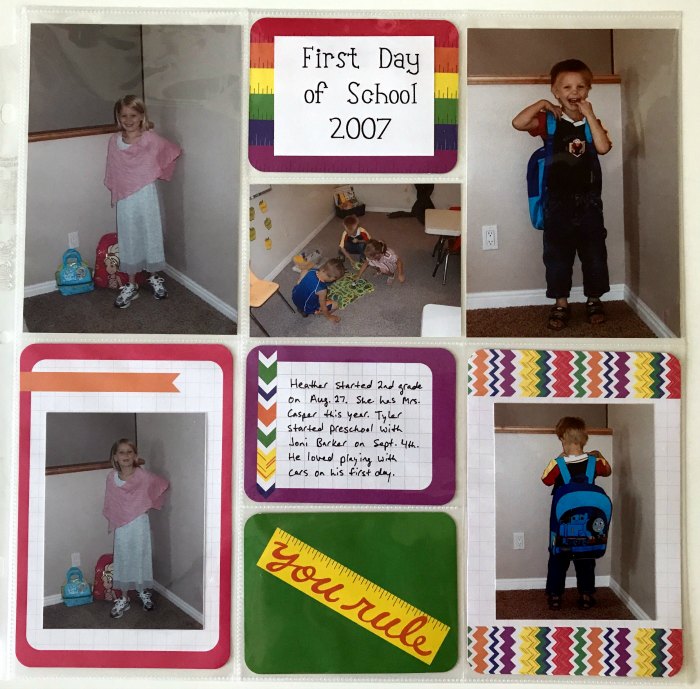
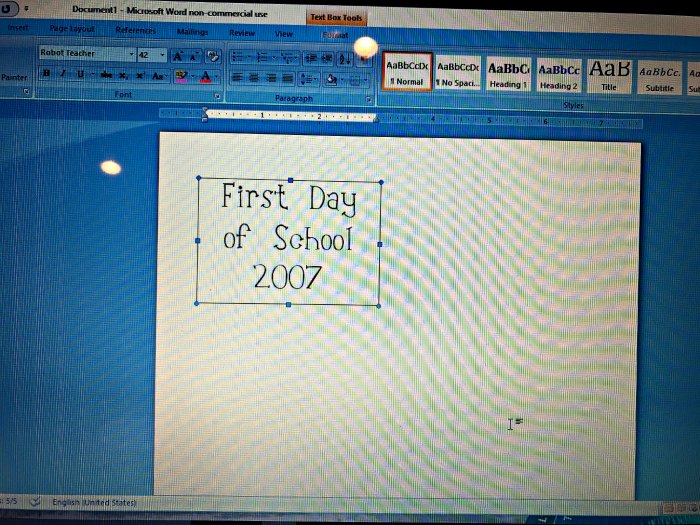
For 2007, I chose the Design D page that has four vertical 4×6 spaces and four horizontal 3×4 spaces. I had printed the bottom two pictures as 3×4, so I added them to 4×6 journal cards to fit the pockets. For the title card, I picked a filler card. Then I made a 2×3 in. text box in Word and added my title in a fun font. Printed it out on cardstock, trimmed it to size and attached it to the filler card.
2008 used the Design G page. It is a smaller page (10×12) but it fits in a regular 12×12 album just fine. I like this design since it has room for four 4×6 photos (2 vertical, 2 horizontal). When I used to print my photos, I would size some of them down to 3×4 and put two photos on one 4×6. It was easier to scrapbook and cheaper to print. Now, you can use the collage feature of the Project Life App to do the same thing.
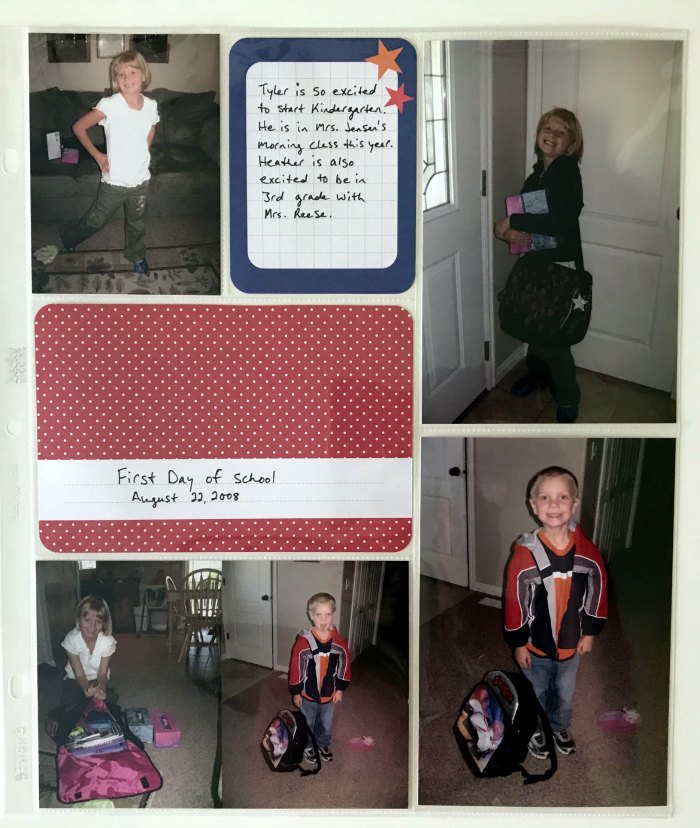
2009 uses the traditional Design A page. I had a couple extra 3×4 pictures that I wanted to include on this page so I decided to trim them down smaller and add them to a 4×6 card.
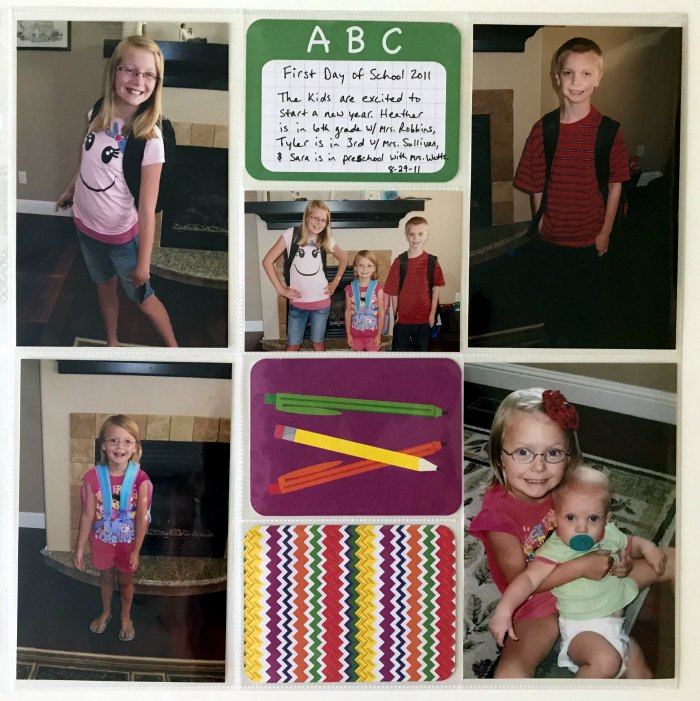
2011 used the Design D again. Since the focus was on the pictures, I decided to just have the journal card double as my title card, and then I used two filler cards on the bottom.
What an awesome feeling to know that all of these pages are done! To find out more about Physical and Digital Project Life, check out beckyhiggins.com. To learn more about the Project Life App, check out my post Rescuing photos with Project Life. Next week’s topic: Catching up with Summer Memories. Follow us on social media so you don’t miss it!
Leave a Reply